Watch the lesson video: The 5 Preliminary Steps: Team, Product, and Flow Diagram (1:34)
Before the seven principles, Codex sets out five preliminary steps. They are not paperwork for its own sake — each one feeds straight into the hazard analysis. Skip them and the analysis is just guesswork.
Step 1: Assemble the HACCP team
HACCP needs a multi-disciplinary team: production, quality assurance, maintenance, sanitation, and engineering — the people who know how the line actually runs, not how the manual says it runs. Add specific expertise where the product demands it: microbiology for ready-to-eat foods, allergen knowledge for multi-product lines, process engineering for thermal processes. Codex strongly recommends the multi-disciplinary approach, matched to the size and nature of the operation. Smaller businesses that cannot field all of this in-house may use external expertise — consultants, trade associations, or a generic HACCP plan from the competent authority adapted to the specific site — but the plan must still reflect the actual plant.
Name a team leader with real HACCP training and the authority to drive the work. Management commitment has to be real: the team needs time on the floor, access to records, and the standing to change procedures. A HACCP plan written by one person at a desk fails at the first audit question: “show me how this reflects reality.” Record the team’s membership, training, and meeting minutes — auditors check that the team exists and functions, not just that names appear on page one.
Step 2: Describe the product
Describe the product fully: composition and ingredients (including allergens), processing method, packaging, shelf life, and storage and distribution conditions. A product sold chilled to care homes for elderly residents carries different hazards than the same product sold ambient to the general public — vulnerable consumers, shelf life, and storage conditions all change the hazard analysis. Where several products share identical processes and hazards, it is accepted practice to group them under one plan, but the grouping must be justified in writing.

Step 3: Identify the intended use
How will the consumer use the product — and misuse it? Ready-to-eat, or requiring cooking? If safety depends on the consumer cooking the product, the cooking instructions on the label are part of the food safety system: they must be clear, and where safety hinges on them, validated and tested for comprehension. Consider reasonably foreseeable misuse — a product meant to be cooked that consumers might eat cold, a refrigerated product left at room temperature on a long drive home. Base the hazard analysis on how consumers actually behave, not how you would like them to behave.
Step 4: Construct the flow diagram
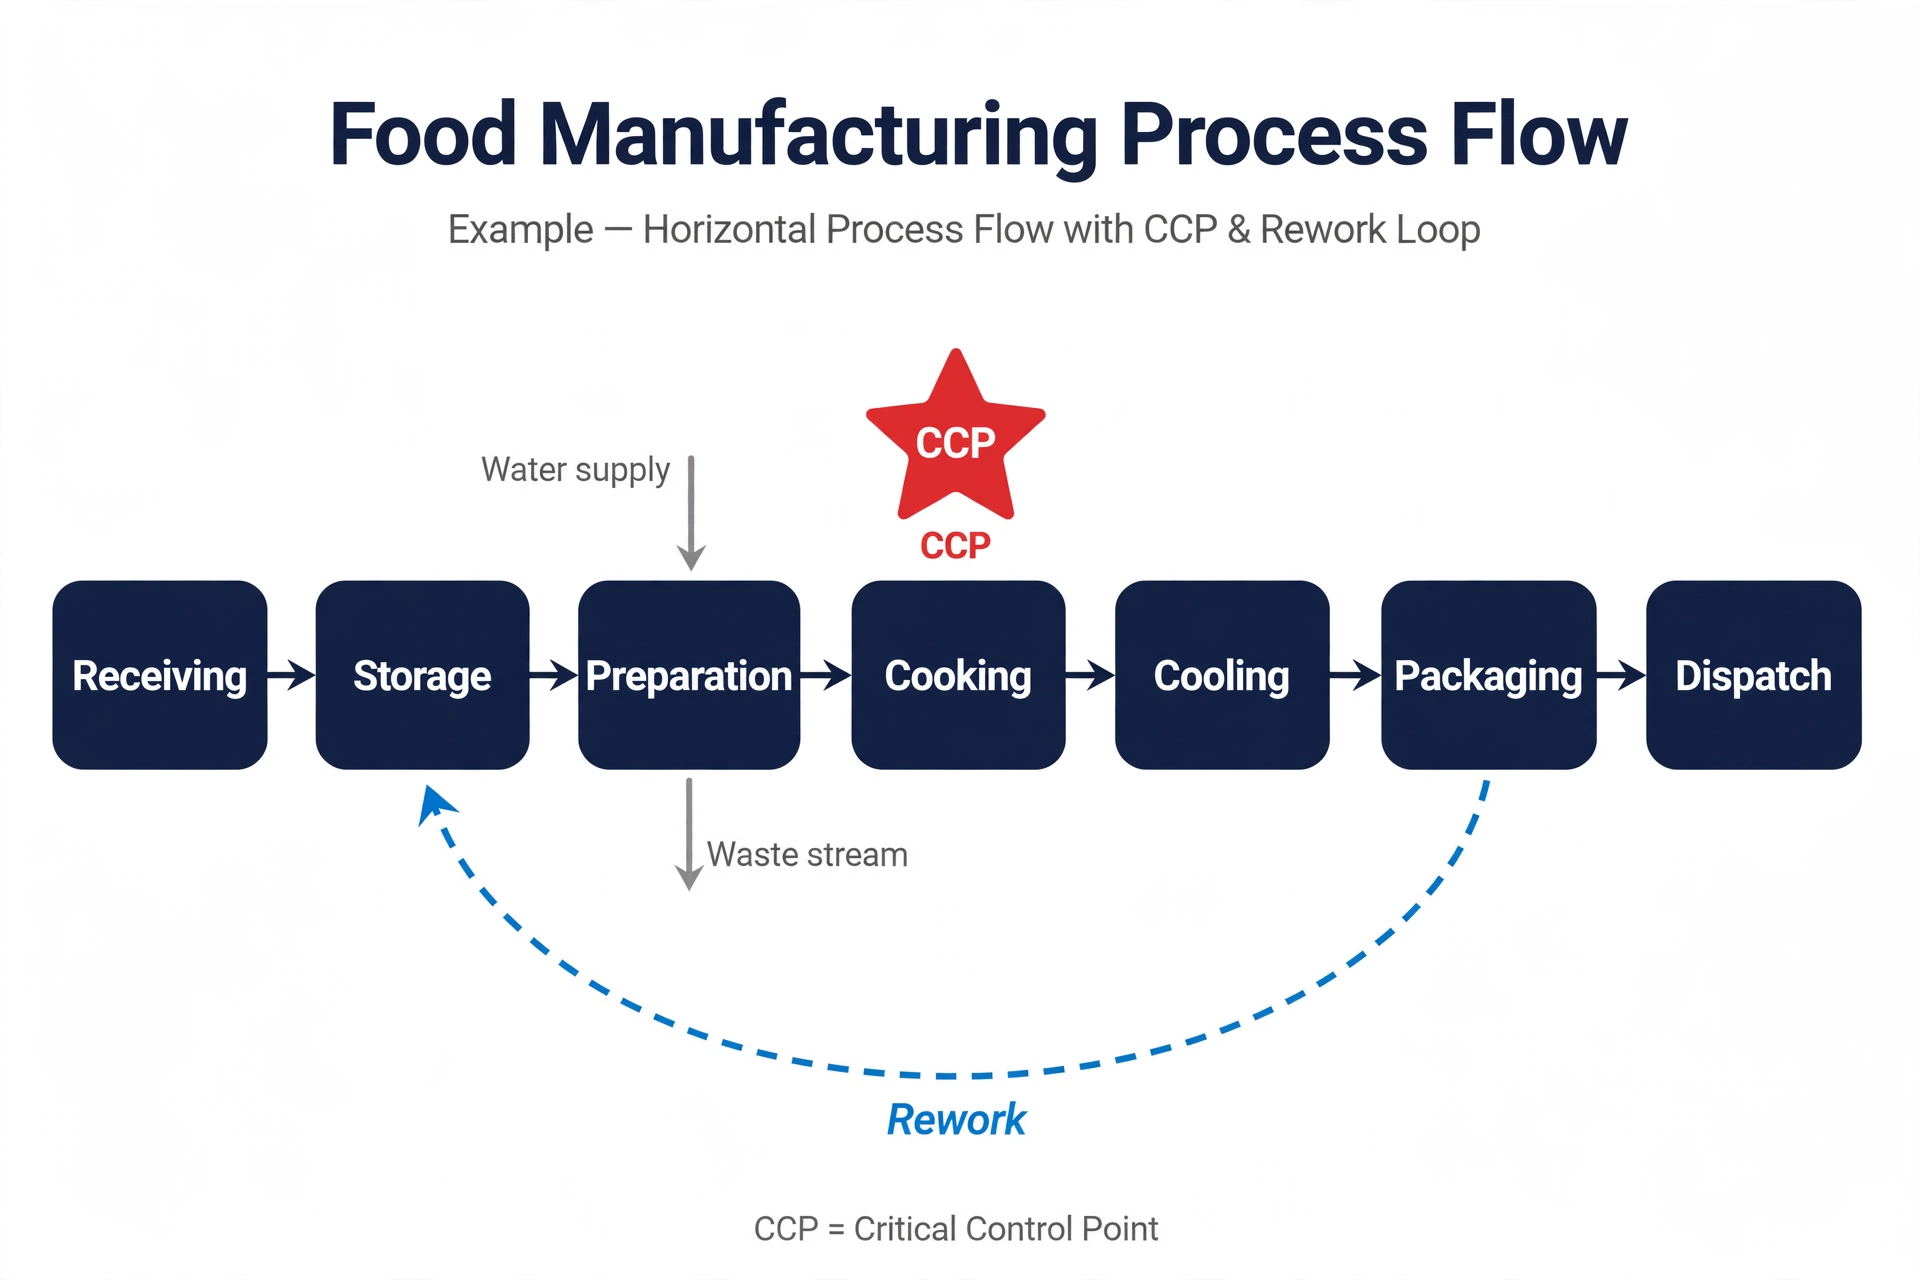
Map every step from receiving raw materials to dispatch of finished product: receiving, storage, preparation, processing, packaging, dispatch. Include the steps people forget to draw — rework and reprocessing loops, water and ice sources, air handling where it contacts product, waste streams, and the points where allergens enter the process. Add the technical detail the hazard analysis will need: time-temperature profiles at each step, the equipment used, and the layout of the line. Date the diagram, version it, and have the team sign it — an unsigned, undated diagram reads as a guess.
Step 5: Confirm the flow diagram on the floor
Walk the line with the diagram in hand during actual production — all shifts, including nights, where practices can differ. Check every step against reality: the rework loop nobody mentioned, the holding time that runs longer than the diagram says, the water hose that reaches product contact surfaces. Every mismatch you find here is a hazard your analysis would have missed. Record the confirmation: date, who walked it, and the corrections made. This is the step auditors love to test — they will walk your diagram themselves, and any step that does not exist on the floor ends the conversation.